
Perform consultation
This tutorial will walk you through how to facilitate a consultation with Scribo. Please note that you can only perform certain actions if you have been granted the respective user permission(s).
Consultation Interface
-
On the homepage under the
🏠 Hometab, double-click to enter the patient’s consultation session. -
Click on the
✍️ Consultationtab. On this interface, you may use different features to facilitate your consultation with a patient, as described in the sections below.

⬇️ Learn more about the consultation interface below ⬇️
Diagnosis
You can input the diagnosis of the patient in the "Diagnosis” box.
You must input at least one diagnosis for each consultation, but you can also input more than one.

Consultation Notes
You can input your consultation notes in the text box provided.
If you do not like to start from scratch, you can start with a note template, or copy from past consultations.

To start with a note template, check the section “Note templates” below.
To copy from the past consultations, check the section “Past Consultations” below.
Patient Overview
Click the Overview subtab to view a summary of the patient information.
This subtab will display the allergy, chronic conditions, chronic drugs, and other relevant information of the patient.
By clicking the Edit button, you can also edit this information during your consultation.

Prescribe
Click the Prescribe subtab to write your prescription.
Click ➕ Add Drug to create a new line of prescription.

Type the drug name in the search bar. There are three modes available:
-
Formulary Only: Prescribe drugs within your formulary (including custom drugs)
- To learn how to manage your drug formulary, visit the Manage your drug formulary tutorial.
-
All Drugs: Prescribe drugs that are not in your formulary
-
When using this mode, drug labels will not be generated.
-
Instead, you can issue and print the respective prescription letter(s) through the
Prescription Lettersubtab under📃 Documents(check the section “Prescription Letter” below) for the patient to get the medication elsewhere.
-
-
Free Text: Prescribe drug by manual entry

Select the drug you would like to prescribe. If common regimens are available, they will be displayed on the right.

Enter the medication order details, such as dosage, frequency, and duration. You can also search and add drug warning labels.
You can pick which brand to prescribe if you have more than one brand in your clinic.

If you have entered the drug cost, you can also preview the cost of this medication order.
To learn how to enter the drug cost, visit the Manage your drug formulary tutorial.
Medical Items
Click the Medical Items subtab to prescribe a medical item.
To learn how to add medical items, visit the Manage your medical items tutorial.
Past Consultations
Click the Past Consultations subtab to view the consultation record of the patient.
You can copy certain content from past consultations at your convenience.
-
To copy drugs prescribed from a past consultation, click the
📑 Copyicon on that section. -
To copy all copyable content of a past consultation, you need to click the
📑 Copyicon on the top-right corner.

Note Templates
Click the Note Templates subtab to view your pre-defined templates.
Select your note template, then click the 📑 Copy icon to use it.

To learn how to create your note templates, visit the Create your note templates tutorial.
Documents
During or beyond the consultation in between a patient’s visit at your clinic, visit the 📃 Documents tab on the consultation interface to manage different types of patient documents and/or letters.
Under the Documents subtab in this interface, click the Upload Document to upload any documents related to the patient.

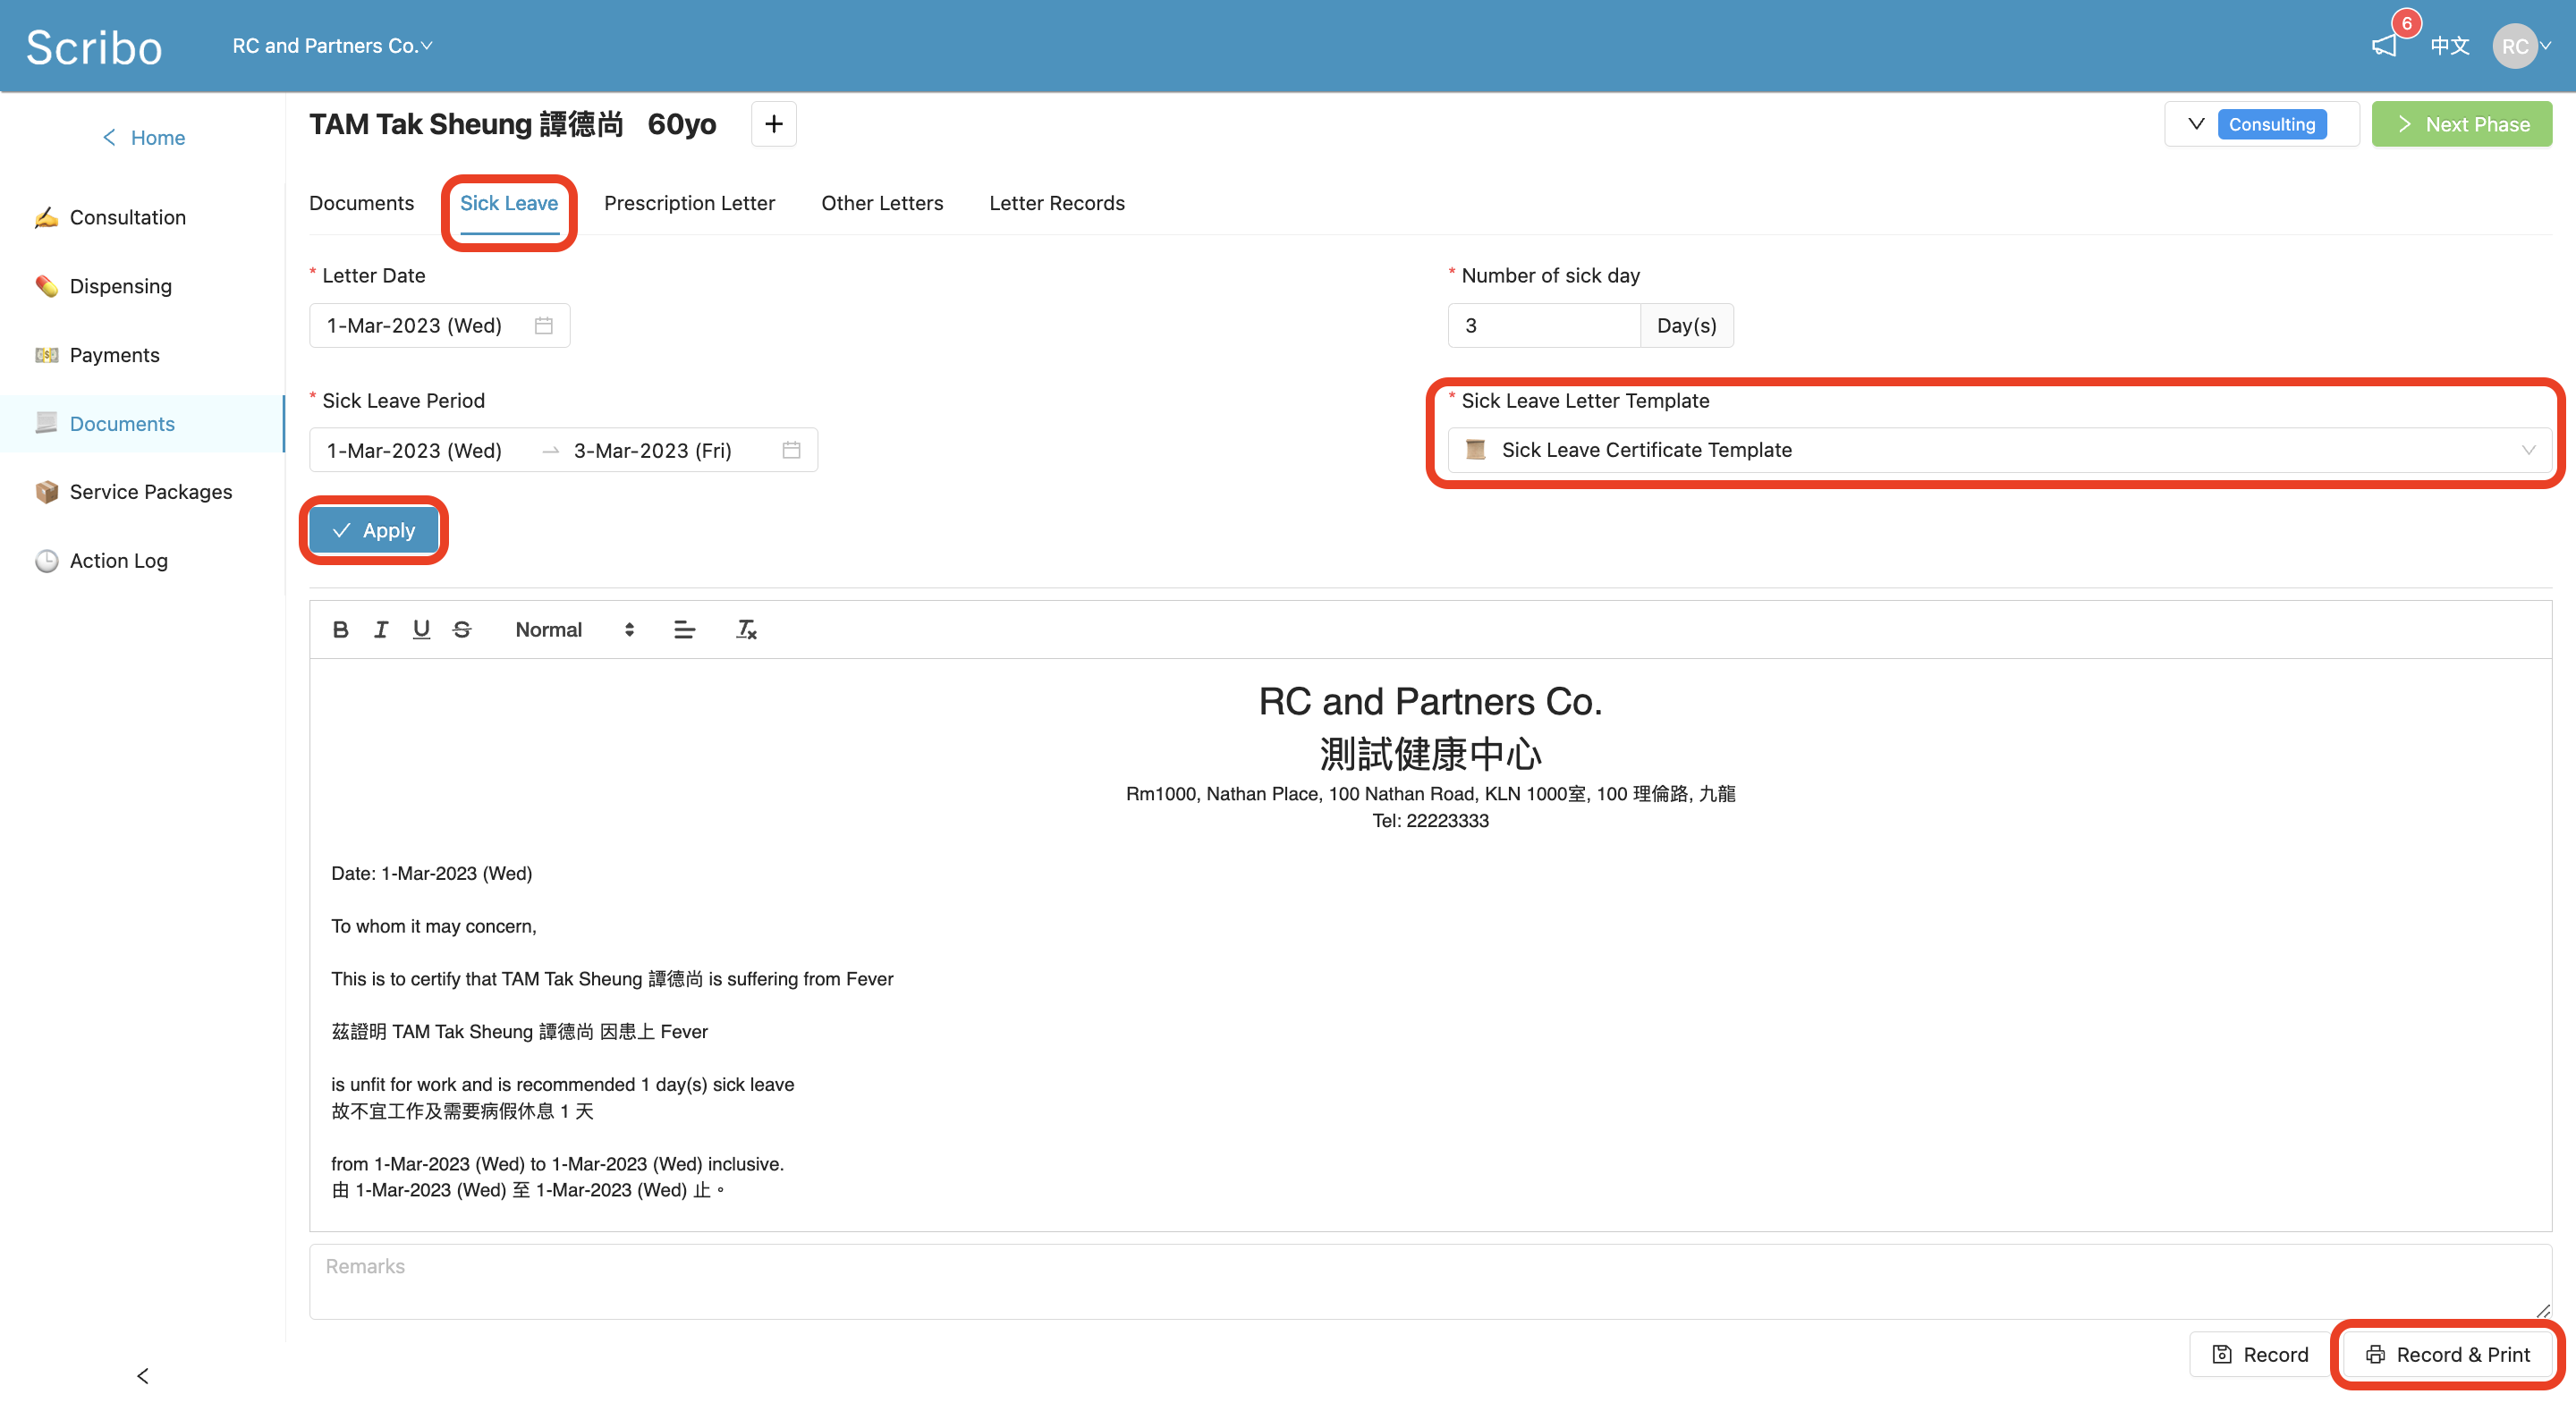
Sick Leave
Under the 📃 Documents tab, visit and use the Sick Leave subtab to produce a sick leave certificate for patient.
Enter the leave period.
Select a sick leave certificate template, then click Apply.
Preview the sick leave certificate content. You can edit the content on the preview window.
Click the 🖨 Record & Print to print the sick leave certificate.
To learn how to customise your templates, visit the Customise your letter templates tutorial.
Prescription Letter
Under the 📃 Documents tab, visit and use the Prescription Letter subtab to produce the prescription letter(s) as required.
Select the drug(s) prescribed that require a prescription letter.
Select a prescription letter template, then click Apply.
Preview the prescription letter content. You can edit the content in the preview window.
Click the 🖨 Record & Print to print the letter.

To learn how to customise your letter templates, visit the Customise your letter templates tutorial.
Other Letters
Under the 📃 Documents tab, visit and use the Other Letters subtab to produce any other types of letters as required.
Select your letter template on the left and preview on the right. You can edit the content in the preview window.
Click the 🖨 Record & Print to print the letter.
If you produced a new letter on this subtab and want to save this letter as a template for future use, click Save as a new letter template.

To learn how to customise your letter templates, visit the Customise your letter templates tutorial.
Service Packages
During or beyond the consultation in between a patient’s visit at your clinic, visit the 📦 Service Packages tab to manage the progress(es) of, if any, the service package(s) delivered to the patient.
-
Under the
📦 Service Packagestab, click➕ Add New Service Packageto apply a service package that is already set up for the patient.- If you have already set up the service package at your clinic, you should be able to see the list of service packages for your selection here. If you have not set it up yet, visit the Configure your clinic account tutorial to proceed with the setup.
-
Click
✔️to select the package(s) as needed. -
Click
Confirmto add it to the record.

After you added the service package, you should be able to track the progress of the package so far applied to the patient here.
- Click the
+button on the row of the service package you would like to see the progress. Then you should be able to see the latest progress of the service package.

- Click the
✏️ Editbutton, and a pop-up window will appear to allow you to enter and update the progress.

- Once a service package is fully delivered to the patient and such is recorded as mentioned above, you may view the completed service package to be recorded under the
Completedsubtab.

- If a service package is removed from being delivered to the patient before its completion, click the
🗑 Deletebutton.

- You may view the deleted service package to be recorded under the
Inactivesubtab
- Should you resume the package for the patient, click
↩️ Reactivateand the package should appear back under the “In Progress” subtab.

Complete consultation
After your consultation with the patient, you may click > Next Phase on the top right corner to move the patient to the next phase.

- Create your Scribo accounts
- Configure your clinic account
- Connect to printer
- Import patient data
- Manage staff accounts
- Manage your drug formulary
- Manage your medical items
- Manage your appointments
- Manage your patients
- Manage patient arrivals
- Perform consultation
- Print drug labels
- Payments and invoices
- Analytics dashboard
- Finance records
- Create your note templates
- Customise your letter templates
